Enhancing Product Design with Insert Molding and Overmolding: A Complete Guide
In today’s competitive manufacturing landscape, product designers and engineers face a critical challenge: how to create components that are lightweight, durable, and multifunctional without compromising on cost or aesthetics. Enter insert molding and overmolding—two advanced manufacturing techniques that redefine what’s possible in product design. To solve the industries push for lighter, stronger, and more integrated component for multi-material manufacturing.
This guide explores how these methods work, their applications across industries, their technical nuances, design best practices, and actionable insights to help you choose the right approach for your project.
The Rise of Multi-Material Components
Consumers and industries alike demand products that combine the best properties of different materials. From ergonomic toothbrushes with soft-grip handles to automotive sensors with embedded electronics, the need for seamless integration of metals, plastics, and elastomers has never been greater.
Insert molding and overmolding address this demand by enabling:
Reduced assembly steps (lower labor costs).
Enhanced durability (stronger material bonds).
Improved user experience (e.g., vibration damping, tactile feedback).
Design freedom (complex geometries unachievable with traditional methods).
Let’s dive into how these processes work and where they shine.
INSERT MOLDING
Insert Molding: Precision Integration of Components
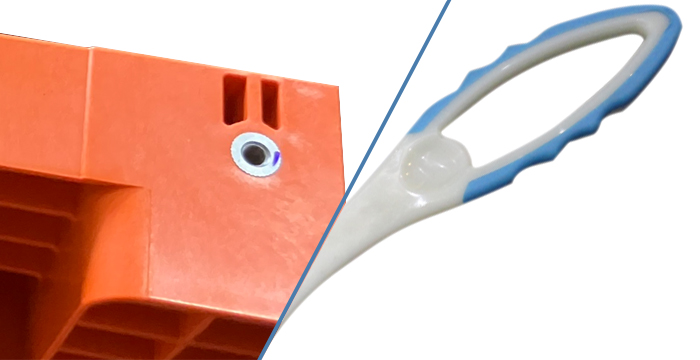
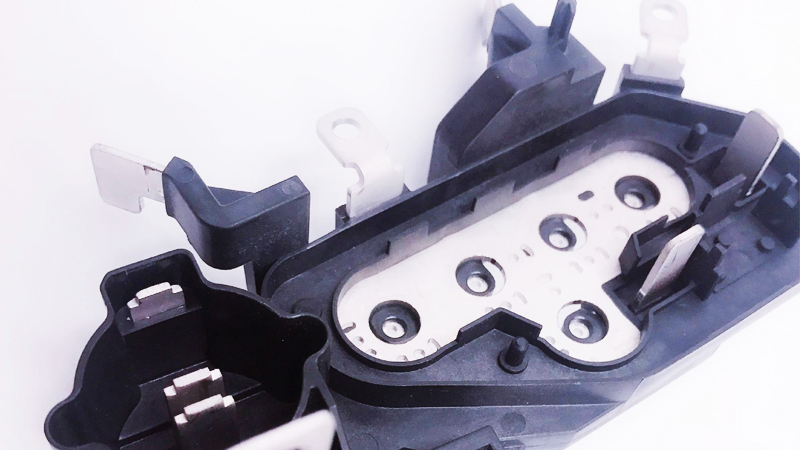
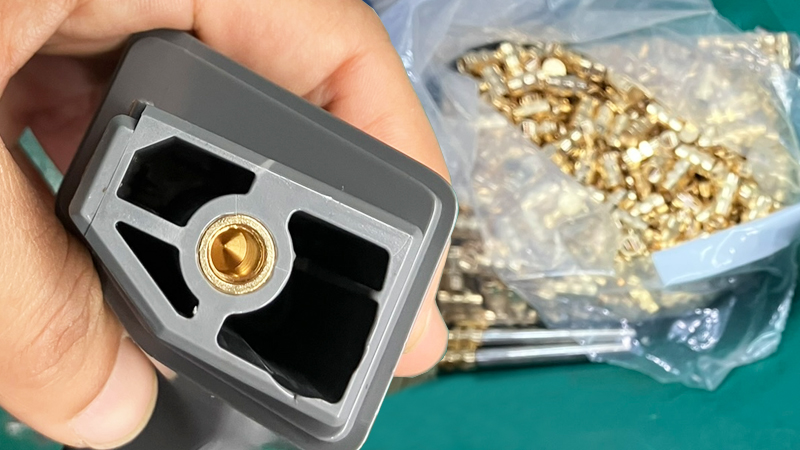
Insert molding involves embedding a pre-formed part (the “insert”)—such as a metal fastener, electronic component, or ceramic substrate—into molten plastic during injection molding. The plastic cools around the insert, creating a permanent, high-strength bond.
Eliminates Post-Assembly: Threaded inserts, electrical contacts, or sensors are molded directly into the part.
Boosts Structural Integrity: Metal-plastic hybrids withstand higher stresses (e.g., load-bearing automotive parts).
Enables Miniaturization: Ideal for microelectronics, where tiny components must be securely encapsulated.
While insert molding offers significant advantages, it has limitations:
Higher Initial Costs: Precision molds and automated insert placement systems increase tooling expenses.
Risk of Insert Misalignment: Requires tight tolerances (±0.05–0.1mm) and robotic precision.
Material Stress: Thermal shrinkage during cooling can create stress concentrations at the insert-plastic interface.
Design Constraints: Inserts must withstand injection pressures (up to 150 MPa) without deformation.
Limited Repair Options: Failed bonds often require scrapping the entire part.
Medical Devices: Hypodermic needles with molded plastic hubs.
Consumer Electronics: USB connectors with shielded metal contacts.
Automotive: Engine sensors with integrated housings.
For electrical product manufacturing, insert molding is a single-step process that integrates parts like connectors and pins, eliminating secondary insertion and enhancing overall production throughput.
OVER
-MOLDING
Overmolding: Layering Functionality and Comfort
What Is Overmolding?
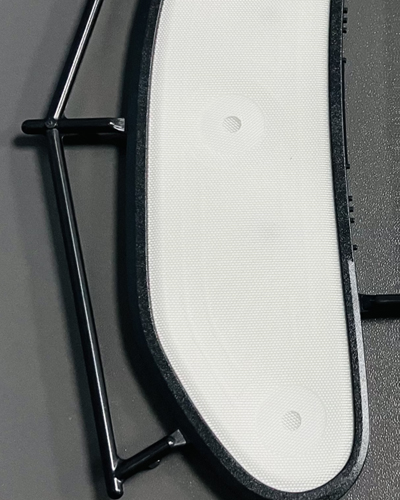
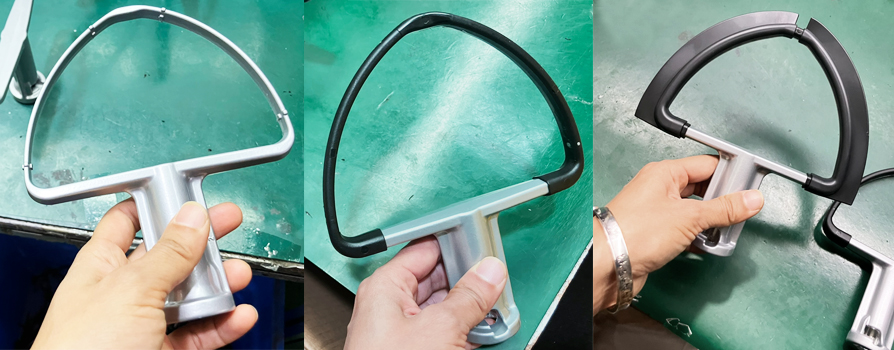
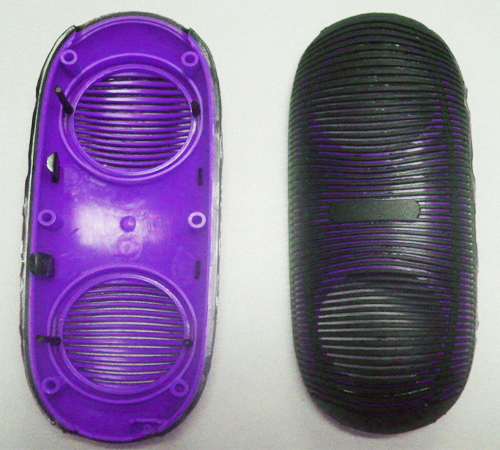
Overmolding adds a secondary material (often a soft elastomer or rubber) over a substrate (plastic or metal) to create a multi-layered part. This is achieved through processes like two-shot molding (sequential injection) or multi-material molding.
Ergonomic Enhancements: Soft grips on tools, handles, or wearable devices.
Environmental Protection: Waterproof seals, shock absorption, or electrical insulation.
Aesthetic Versatility: Color contrasts, textured surfaces, or brand-specific detailing.
While overmolding enhances functionality and aesthetics, it comes with challenges:
Material Compatibility Limitations: Not all plastics/elastomers bond chemically. For example, bonding silicone to polypropylene (PP) requires costly adhesion promoters or surface treatments.
Delamination risks increase in high-moisture or high-temperature environments.
Higher Tooling Costs: Multi-cavity molds or rotary plates for two-shot molding increase upfront expenses.
Complex mold designs (e.g., sliding cores for undercuts) add to maintenance costs.
Longer Cycle Times: Sequential molding steps (substrate + overmold) slow production vs. single-shot processes.
Cooling time must be optimized for both materials to prevent warping.
Design Constraints: Wall thickness ratios between substrate and overmold must be carefully controlled to avoid sink marks or uneven cooling.
Sharp transitions between materials can create weak points prone to tearing.
Process Sensitivity: Humidity or contamination during molding (e.g., dust on substrates) compromises adhesion.
Overmolding liquid silicone rubber (LSR) requires precise temperature control (±1°C) to avoid flow issues.
Limited Repairability: Failed overmolded parts are difficult to rework; defects often require scrapping the entire component.
Healthcare: Surgical tools with non-slip silicone grips.
Consumer Goods: Smartphone cases with shock-absorbing TPU layers.
Industrial Equipment: Seals with rigid cores and flexible exteriors.
Insert Molding vs. Overmolding: What’s the Difference?
Insert Molding vs. Overmolding: Detailed Comparison
1. Process Overview
| Aspect | Insert Molding | Overmolding |
| Process Steps | 1. Insert placement → 2. Plastic injection → 3. Cooling/ejection | 1. Mold substrate → 2. Transfer to second mold → 3. Overmold injection → 4. Cooling/ejection |
| Cycle Time | Faster: 30–60 seconds (single material + insert). | Slower: 60–120 seconds (multi-step process). |
| Tooling Complexity | Moderate (single cavity with insert fixtures). | High (multi-cavity molds or rotary plates for two-shot molding). |
2. Material Selection
| Factor | Insert Molding | Overmolding |
| Typical Materials | Metals + engineering plastics (e.g., PEEK, nylon). | Rigid plastics (ABS, PC) + elastomers (TPE, LSR). |
| Key Constraints | CTE mismatch, insert heat resistance. | Chemical compatibility (bond strength). |
3. Production Speed & Cost
| Factor | Insert Molding | Overmolding | |
| Tooling Cost | 10,000–10,000–30,000 (depending on insert complexity). | 20,000–20,000–50,000 (multi-cavity molds). | |
| Per-Part Cost | Lower at high volumes (automation-friendly). | Higher due to multi-step processing. | |
| Labor Dependency | Low (robotic insert placement). | Moderate (manual substrate transfer in some cases). |
4. Drawbacks
| Factor | Insert Molding | Overmolding |
| Key Drawbacks | High tooling costs, insert misalignment risks, thermal stress. | Material compatibility challenges, longer cycle times, delamination risks. |
| Repairability | Difficult (bond failures often scrap the part). | Nearly impossible (layers cannot be separated). |
Material Selection and Compatibility: A Technical Deep Dive
Insert Molding Materials
Metals: Stainless steel, brass, aluminum (for conductivity, strength).
Ceramics: Used in high-temperature or electrically insulating applications.
Plastics/Prefabricated Parts: Nylon sleeves, pre-molded connectors.
Engineering Thermoplastics:
PEEK: High heat resistance (up to 250°C), ideal for automotive/medical inserts.
Polycarbonate (PC): Transparency and impact resistance for electronic housings.
Nylon (PA6, PA66): Good adhesion to metals with moderate thermal expansion.
Coefficient of Thermal Expansion (CTE): Mismatched CTE between insert and plastic can cause warping or cracking. Example: Aluminum (23 µm/m°C) paired with PEEK (50 µm/m°C) requires careful cooling rate control.
Surface Treatments: Plasma coating or chemical etching (e.g., chromic acid for brass) improves bonding.
Overmolding Materials
Rigid Plastics: ABS, PC, PP (provide structural support).
Metals: Requires adhesion promoters for elastomer bonding.
Thermoplastic Elastomers (TPE/TPU): Shore hardness 30A–90A for grips/seals.
Silicone: Biocompatible, heat-resistant (medical/consumer goods).
LSR (Liquid Silicone Rubber): For precision parts with complex geometries.
Chemical Bonding: Polar materials (e.g., PC) bond better with polar TPEs.
Adhesion Promoters: Silane-based primers for metal-to-elastomer bonding.
Insert molding and overmolding each offer unique advantages, but success hinges on meticulous material selection, process design, and addressing their inherent limitations. By leveraging this guide, engineers can optimize part performance, reduce costs, and avoid costly redesigns.
Need support with material testing or mold design?
TONGDA LINK’s expertise in multi-material molding ensures your project meets exacting standards for precision and durability.
Insert Molding vs. Overmolding: Choosing the Right Technique
| Factor | Insert Molding | Overmolding |
| Primary Purpose | Integrate pre-made inserts | Add functional/comfort layers |
| Material Compatibility | Metals, ceramics, or plastics | Thermoplastics + elastomers |
| Cycle Time | Faster (single material + insert) | Slower (multi-step process) |
| Cost Efficiency | High for high-volume production | Ideal for mid-to-high volumes |
When to Choose Each Technique
Insert Molding: Prioritize for:
Projects requiring embedded metal parts (e.g., screws, connectors) or functional parts (sensors, threaded inserts). .
High-volume metal-plastic hybrids (e.g., electrical connectors).
High-precision applications (medical or aerospace components).
Avoid Insert Molding If:
Inserts are prone to thermal deformation (e.g., thin-walled metal parts).
Low-volume production doesn’t justify automation costs.
Overmolding: Ideal for:
Products needing soft-touch surfaces or vibration damping.
Multi-material parts with ergonomic or protective layers (e.g., tool handles).
Designs prioritizing aesthetics or user comfort.
Low-to-mid volume production with aesthetic requirements.
Avoid Overmolding If:
Your project has strict cost/time constraints (opt for co-molding or pre-assembled parts).
Materials lack inherent adhesion and primers are not feasible.
Both techniques demand careful evaluation of trade-offs. While overmolding excels in ergonomic and protective applications, its material limitations and process complexity require rigorous testing. Insert molding, though efficient for metal-plastic hybrids, faces challenges in thermal management and precision alignment.
Pro Tip:
Collaborate early with TONGDA LINK to conduct feasibility studies and mitigate these drawbacks.
Brief Guide to Designing for Insert Molding and Overmolding
Insert Molding Design Checklist
Define Insert Specifications:
Material, surface finish, and dimensional tolerances.
Avoid sharp edges to prevent plastic flow hesitation.
Surface Preparation:
Clean inserts thoroughly to prevent contamination.
Material Pairing:
Match CTE values (e.g., Select plastics with thermal expansion rates matching the insert, PPS or PEEK for metal inserts).
Use FEM simulations to predict thermal stress.
Mechanical Interlocking/Bonding Features:
Add knurling, holes, or undercuts (0.1–0.3mm depth) for adhesion.
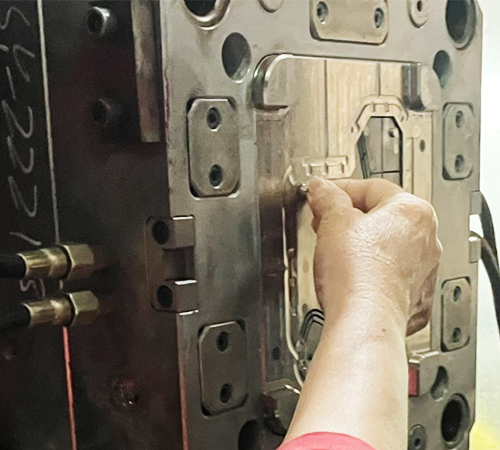
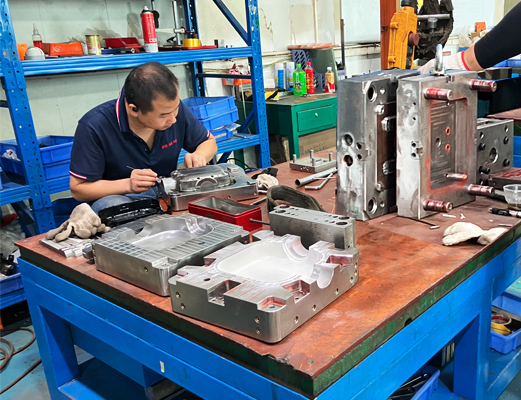
Mold Design:
Incorporate ejector pins that avoid insert contact.
Ensure proper venting to prevent air traps near inserts.
Prototyping:
Test with low-temperature plastics (e.g., PP) before scaling to high-temp materials.
Overmolding Design Checklist
Substrate Preparation:
Roughen surfaces (Ra 1.6–3.2 µm) or apply chemical primers.
Wall Thickness Optimization:
Maintain uniform thickness to prevent warping or sink marks. Overmold layer should be 50–75% of substrate thickness to prevent sink marks.
Gate Placement:
Position injection gates away from critical aesthetic surfaces to minimize weld lines.
Material Compatibility Testing:
Conduct peel tests (ASTM D903), ensure the substrate and overmold material adhere chemically (use adhesion promoters if needed) to validate adhesion strength.
Draft Angles:
Include 1–2° draft angles for easier ejection.
Industry Innovations and Future Trends
Sustainable Materials: Bio-based TPEs and recycled plastics for eco-friendly overmolding.
Smart Manufacturing: AI-driven mold flow simulations to predict bonding issues.
Hybrid Techniques: Combining 3D-printed substrates with overmolded layers for rapid prototyping.
TONGDA LINK SUCCESS STORIES
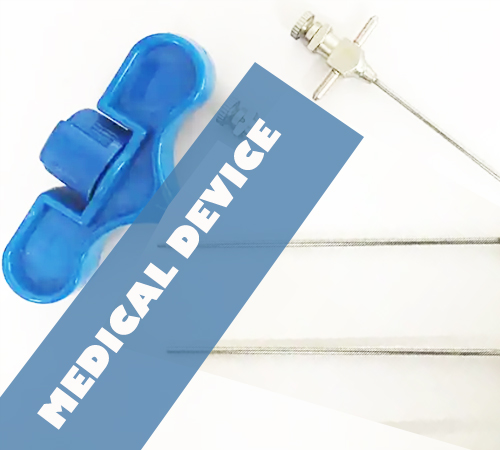
INSERT MOLDING
Case Study 1: A medical device company reduced assembly costs by 40% using insert molding to integrate stainless-steel trocars into disposable laparoscopic tools.
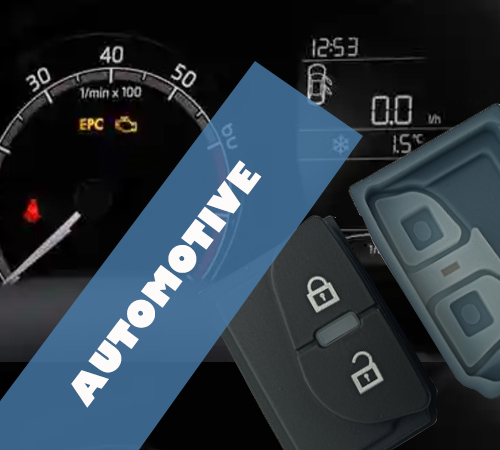
OVERMOLDING
Case Study 2: An automotive supplier improved dashboard button durability by overmolding polycarbonate cores with silicone for tactile feedback and UV resistance.
Insert molding and overmolding are not just manufacturing techniques—they’re tools for innovation. By understanding their strengths, limitations, and ideal applications, designers can create products that are lighter, smarter, and more user-friendly than ever before.
Unlocking Design Potential
–PARTNER WITH TONGDA LINK
FAQs
A: Yes! Bio-based TPUs and PLA blends are increasingly popular for sustainable overmolding.
A: Typical tolerances range from ±0.1 mm to ±0.3 mm, depending on insert size and material.
A: Pre-treat substrates with plasma or chemical etching, and conduct rigorous material compatibility tests.
A: Typically no—insert molding focuses on one insert and one plastic. For multi-layer parts, overmolding or two-shot molding is preferred.
A: Inserts can range from microscopic (e.g., 1mm electrical contacts) to large (e.g., 300mm metal frames), but larger inserts increase warping risks.
Ready to elevate your product design?
Partner with a manufacturer to leverage cutting-edge molding technologies tailored to your project’s needs.